Project Installation#
Solution is based on NVIDIA Omniverse with Python interface. There are two ways of installation. End user installation and development installation. The guide follows Linux based installation steps, which is also the recommended option.
End User Installation#
Docker Compose#
Error
Docker Compose guide is not complete!
Attention
❗ NVIDIA GPU is required. ❗
To be able to run ArDaGen using Docker Compose, perform following steps:
Install Docker (how to install).
Install Docker Compose (how to install).
Development Installation#
Follow the instruction steps. Linux (Ubuntu 22.04) installation was tested only. The installation might not work on Windows.
Attention
❗ NVIDIA GPU is required. ❗
Build Isaac Sim from GitHub repo.
Install Microsoft Visual Studio Code. Other IDEs are not supported out of the box, nor tested.
Download the repository using
git clone --recurse-submodules https://github.com/OndrejSzekely/metron_ai_ardagen.git
Move ArDaGen repository into Isaac Sim’s build root folder.
# a sample command, your paths will be different and also Isaac Sim version might not match
mv  /ssd_crucial/projects/metron_ai_ardagen /ssd_crucial/omniverse/isaacsim/_build/linux-x86_64/release
Install uv tool on your host system.
Install project’s dependencies using uv.
Reference Installation Steps
uv sync --group devtools --all-extras --inexact --frozen
To start Visual Studio project, go into Isaac Sim’s build root folder and run
code .. It will open a setup Visual Studio project with everything predefined.In the Explorer tab whole Isaac Sim folder is present, but everything else, except metron_ai_garden folder, is irrelevant for the development.
Hint
📋 ✋ Be aware that debuging is performed using the Python: Current File option in Run & Debug.
Append
"./metron_ai_ardagen",
into
python.analysis.extraPathslist in<ISAAC_SIM_BUILD_ROOT_FOLDER_PATH>/.vscode/settings.jsonfile.Install missing Python requirements - go into Isaac Sim’s root folder and run
./python.sh -m pip install -r metron_ai_ardagen/requirements.txt.Download Metron AI ArDaGen Omniverse Extension, which is an Omniverse Extension, somewhere on filesystem.
git clone --recurse-submodules https://github.com/OndrejSzekely/metron_ai_ardagen_omni_ext.git
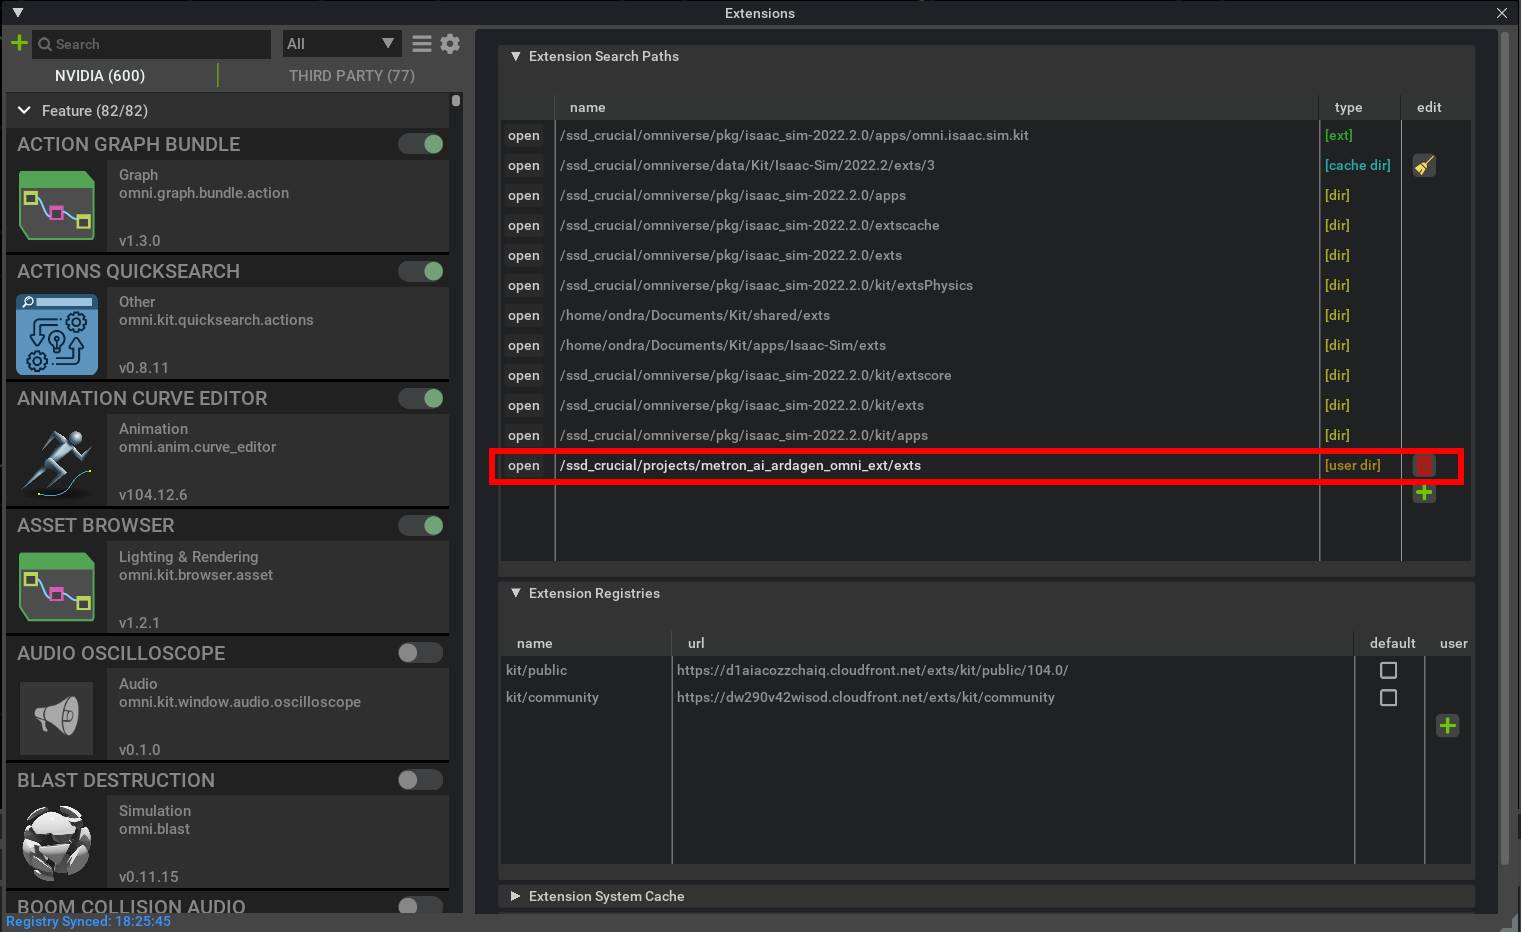
Run Isaac Sim and open Extension window (window ⟶ Extensions). Click on the gear icon and in Extension Seatch Paths add the path to
extsfolder in the cloned Metron AI ArDaGen Omniverse Extension repository.
Bug Fixes#
Bug #1: OV Replicator camera detach fails at the end of data generation#
'dict' object has no attribute 'discard'
  File "/ssd_crucial/omniverse/library/isaac_sim-2022.1.0/exts/omni.replicator.core-1.2.0+cp37/omni/replicator/core/scripts/writer_registry.py", line <line_num>, in detach
In exts/omni.replicator.core<VERSION>/omni/replicator/core/scripts/writer_registry.py on line <line_num> change
cls._render_product_writer_mapping[render_product].discard(writer_name)
into
cls._render_product_writer_mapping[render_product].pop(writer_name)